About E-Blogger Template

This blog will provide you latest blogger design templates in 2013 and hope you will satisfied with my blog templates.Please come again and download free here blogger design templates.

Monday, December 2, 2013

Expand Widget Templates in new Blogger HTML Template Editor


Today I am sharing a useful post that all of Blogger Bloggers searching in Blogger New HTML Editor.
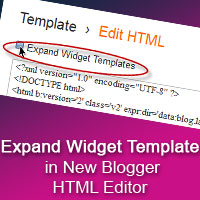
In old HTML Editor, there is an option "Expand Widget Templates".
By default while editing HTML code, Blogger shows only core of template and not shows the Blogger Widget codes. To see the full template code you have to select the option "Expand Widget Templates"
This option is very useful to add new features or additional features inside specific widgets in Blogger template.
Here I am going to show you how to do in new Blogger HTML Editor.
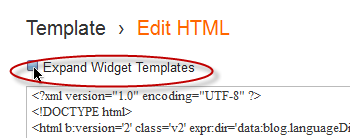


This is the option in old Blogger Template.
The new Blogger Template looks like the following.
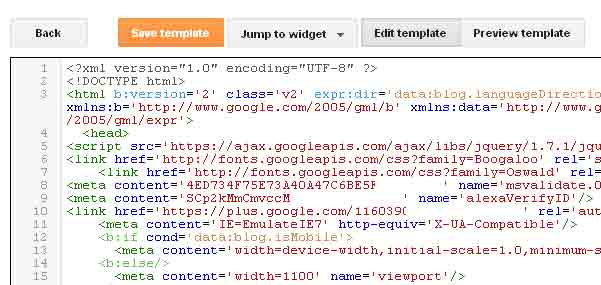


You can't expand all widgets simultaneously. You have to expand each Widgets by clicking the right arrows as shown below.
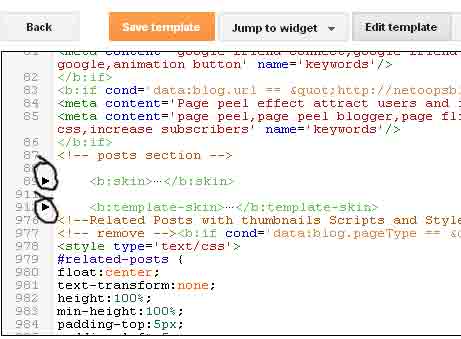


Also you can expand the code of specific widget, take "Jump to widget" from the drop down box take the appropriate widget to see the code.
I think this article will help you not a lot but a little, if so please take a few seconds to share this article..

View the original article here

Read more ...

Sunday, December 1, 2013

Awesome Stylish 404 Error Pages For Blogger


Custom 404 Error Page for Blogger
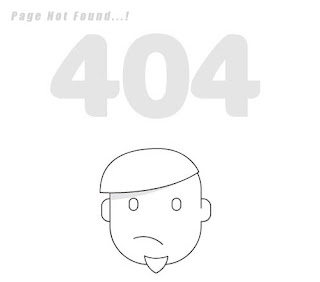
404 Error or Page Not Found Error generated by Blogger when a user enters an invalid URL or 404 Error is an HTTP status code that means the page you are trying to reach on your Blog couldn't found or Page not exist in the Server.
By Default Blogger shows Error page message in a box and its not look Style.
Here I am saying about how to Customize it much better...


Only Custom message [No Style]

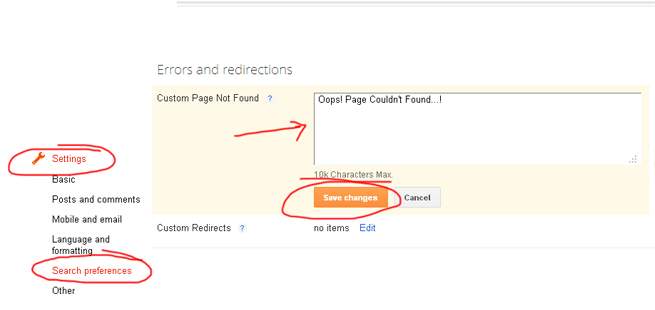
If you want to show only a custom message then First Go to updated Blogger Interface
Then Go to Setting->Search Preferences


Error Message with Stylish 404 images

If you want Colorful Stylish  404 page do the following.


  • Go to Design->Edit HTML

  • Find and copy the below code just above it.


  • Save the Template

Error Page Style 1


Custom 404 error page for blogger 1


  •  Go to Setting->Search Preferences

  • Copy below code in Custom Page Not Found section [as shown in fig. first]

Oops..!


Sorry,You are trying to reach an invalid page...!
Click here to go to Homepage
Have a nice Day...


Error Page Style 2

Blogger custom Error page


  • Go to Setting->Search Preferences

  • Copy below code in Custom Page Not Found section [as shown in fig. first]

Oops..!


Sorry,You are trying to reach an invalid page...!
Click here to go to Homepage
Have a nice Day...


Error Page Style 3


  • Go to Setting->Search Preferences

  • Copy below code in Custom Page Not Found section [as shown in fig. first]

Oops..!


Sorry,You are trying to reach an invalid page...!
Click here to go to Homepage
Have a nice Day...


Error Page Style 4

blogger custom 404 error page


  • Go to Setting->Search Preferences

  • Copy below code in Custom Page Not Found section [as shown in fig. first]

Oops..!


Sorry,You are trying to reach an invalid page...!
Click here to go to Homepage
Have a nice Day...


Error Page Style 5


  • Go to Setting->Search Preferences

  • Copy below code in Custom Page Not Found section [as shown in fig. first]

Oops..!


Sorry,You are trying to reach an invalid page...!
Click here to go to Homepage
Have a nice Day...


Error Page Style 6


  • Go to Setting->Search Preferences

  • Copy below code in Custom Page Not Found section [as shown in fig. first]

Oops..!


Sorry,You are trying to reach an invalid page...!
Click here to go to Homepage
Have a nice Day...


Then Click Save..That all..
First thanks to Bloggerplugins.com for the custom error page code, visit here. Then i made some changes and add beautiful 404 images that i was inspired from HongKiat .

I thinks this article helped you..If any bugs of doubts don't hesitate to ask..do comment...
Like and share...

View the original article here

Read more ...

Saturday, November 30, 2013

Add Google Official Contact Form Widget to Blogger?


Add Google Official Contact Form Widget to Blogger
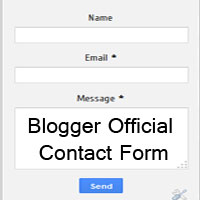
Contact Form Widget is used to send mails to the Blog owner from the visitors/users. Do your blog looks anything missing?. I think a Contact Form is an important widget that was missed for long time. Are you using Contact From in your blog? If so, it will not Google's Official contact Form. That may be from other hosted providers. Here Google released its brand new Contact Form Widget for Blogger Users. It helps to send e-mails to blog owner without Sign In to Google or any other account. Anyone can send mails by providing a valid e-mail address and Message. This Contact Form can add to any blogger blogs that hosted in Google's Server.


 It have three Fields- Name,e-mail and Message and a Send Button. E-mail and Message field are mandatory. It also have e-mail validation, checks whether the e-mail address provided is valid or not. And a notice or message will appear to show the status of sending e-mail, Shows success message it it delivered to user,otherwise shows error message.  There is no CAPTCHA (Used to prevent Spam) in the Contact Form, but Google implemented its effective Spam detection mechanisms. The problem exist with the Contact Form is it can only use as Widget (in Sidebar or  Footer or Under Posts). In many popular websites/blogs they use a page for Contact Form. By default this Contact Form can used as widget, we introduce a technique to use Google Official contact Form on Blogger Static Pages


Advantages


  • Send e-mails to Blog owner without Sign In to any Accounts.

  • E-mail validation is provided.

  • Spam detection Mechanism.

  • Show status message of sending.

Disadvantages


  • Use only as Widget (in Sidebar/ in Footer)

  • No CAPTCHA

Add Google Contact Form to Blogger


  • Sign In to Blogger Dashboard

  • Select Layout -> Click on Add a Gadget

  •  Select More Gadgets in Left Side and Select Contact Form

  • Give the Title and Click Save


  • You have done please check your blog.
When visitor drop a message it goes straight to your inbox. One copy of the message will send to each Admin.
I hope this Contact Form will help your blog to get Suggestions and queries from visitors.

View the original article here

Read more ...

Thursday, November 28, 2013

How to Change Blogger POST A COMMENT Message/Text/Style?


Change Post a Comment text from Blogger
You know Comments are the best way to interact or make a good contact with your blog visitors.I think you are all seen a message "Post a Comment" in the bottom of every post in your blog. Do you think it is not so good to see your blog visitors? Then here I am going to show you how to change "Post a Comment" text from that part and place interesting images there. Also I am giving some cool images link with this article. Lets see how to change this


  • Sign In  to Blogger Dashboard

  • Go to Template -> Edit HTML

  • Search (Ctrl+F) for the code marked Bold


  •  Search the next ,that code looks like the following


  • replace  with the image code

  • Select the code of image you want from the following


Style 1


Style 2


Style 3


Style 4


Style 5


Style 6


Style 7


Style 8


Style 9


Style 10


Style 12


  • Save Template

I hope this article will help you. If you got any doubt or Suggestions, please do comment

Article also Applicable for


View the original article here

Read more ...

Wednesday, November 27, 2013

Awesome Recent Comments Widget for Blogger, Feed Comments


Awesome Recent Comments Widget for Blogger, Feed Comments
Recent Comments Widget can be used to display the latest Comments in the blog. Comments are the best way to make a good contact with your blog visitors and followers. By default Blogger added commenting System to Blogger blogs. Recent Comments Widget will inspire your blog visitors to post a comment on your Blog. If you don't like to read full about this widget or Are you hurry to add this widget to you blog go to "How to add Recent Comments Widget to Blogger Blog".


There are many changes made to Blogger Commenting System. At earlier time the basic commenting System was used then it changed to Threaded Comments (Others can reply to one comment), it can be change back to basic blogger Commenting System. All Blogger blogs are using Threaded Comments System. Now another type of commenting System was introduced in Blogger Blogs, Google+ commenting System.
The Recent Comments Widget also inspire your blog visitors to post a comment. Your visitors may be interested to see their names in other blogs. If their comment is good ,it will catch other visitors eyes and they also may have wish to do comment.
The Recent Comment Widget shows the Commentators name with Profile link followed by the Post name and followed by their Comment. This Widget can be added to Sidebar or Footer or anywhere which catches the visitors eyes. This Widget was coded using JavaScript and you can also change the style of Widget according to your template.


Wish to see Demo?
Recent Comments Widget


How to Add Recent Comments Widget?


  • Sign In to Blogger Dashboard

  • Select Layout -> Click on Add a Gadget

  • Take HTML/Javascript from the list

  • Give the Title and Copy the below code to it and Save


Recent Comments Widget


  • Change the RED highlighted with your blog name
If you want different Styles for this Widget, Please visit again I will post soon.

Another Way to add Recent Comments Widget


  • Go to Layout -> Click on Add a Gadget

  • Select Feed from the list and give the following URL

http://netoopsblog.blogspot.com/feeds/comments/default


  • Change the RED marked portion with your Blog URL
A Window will appear and shows demo,there are some options, you can select the options for adding comment date, commenter name etc.. Using this method you have only limited options.


  • Click Save
Congratulations you have done..
I hope this article will help you and you enjoyed this article if so, Please Like and Share .


View the original article here

Read more ...

Tuesday, November 26, 2013

How to add Search engine Friendly Title to Blogger?


This article will help new blogger blog owners and all bloggers to make their blog search engine friendly Titles.By default Blogger blog titles are not search engine friendly.Page Title is group of text that appears on top of your browser.It is more important in showing your blog/blog posts on Search engine results.The Page title is the most important element in your blog in terms of higher ranking in search results.
Here is example,the figure shows the title of our blog post,the blog title is displayed first and after that the post title has been displayed.


Google only displays 70 characters on Google search results and in case of Yahoo display bit more.So your blog posts will not display or you will not get as much rank in Search Results.Let us think about reversing of position of the blog title and post title,Giving the first priority to Post title and it will works.
It will appears like the following figure.

This
Lets see how to optimize your blogger blog titles Search engine friendly.


  • Go to Design->Edit HTML

  • find the following 

<data:blog.pageTitle/>


  • Replace the it with the following code


<data:blog.pageTitle/>

<data:blog.pageName/><SPAN style="COLOR: red"> </SPAN><B style="COLOR: red">- NetOops Blog</B>
Replace the red text by your blog's Name
Done..! you have an SEO friendly page title.

View the original article here

Read more ...