About E-Blogger Template

This blog will provide you latest blogger design templates in 2013 and hope you will satisfied with my blog templates.Please come again and download free here blogger design templates.

Saturday, November 30, 2013

Add Google Official Contact Form Widget to Blogger?


Add Google Official Contact Form Widget to Blogger
Contact Form Widget is used to send mails to the Blog owner from the visitors/users. Do your blog looks anything missing?. I think a Contact Form is an important widget that was missed for long time. Are you using Contact From in your blog? If so, it will not Google's Official contact Form. That may be from other hosted providers. Here Google released its brand new Contact Form Widget for Blogger Users. It helps to send e-mails to blog owner without Sign In to Google or any other account. Anyone can send mails by providing a valid e-mail address and Message. This Contact Form can add to any blogger blogs that hosted in Google's Server.


 It have three Fields- Name,e-mail and Message and a Send Button. E-mail and Message field are mandatory. It also have e-mail validation, checks whether the e-mail address provided is valid or not. And a notice or message will appear to show the status of sending e-mail, Shows success message it it delivered to user,otherwise shows error message.  There is no CAPTCHA (Used to prevent Spam) in the Contact Form, but Google implemented its effective Spam detection mechanisms. The problem exist with the Contact Form is it can only use as Widget (in Sidebar or  Footer or Under Posts). In many popular websites/blogs they use a page for Contact Form. By default this Contact Form can used as widget, we introduce a technique to use Google Official contact Form on Blogger Static Pages


Advantages


  • Send e-mails to Blog owner without Sign In to any Accounts.

  • E-mail validation is provided.

  • Spam detection Mechanism.

  • Show status message of sending.

Disadvantages


  • Use only as Widget (in Sidebar/ in Footer)

  • No CAPTCHA

Add Google Contact Form to Blogger


  • Sign In to Blogger Dashboard

  • Select Layout -> Click on Add a Gadget

  •  Select More Gadgets in Left Side and Select Contact Form

  • Give the Title and Click Save


  • You have done please check your blog.
When visitor drop a message it goes straight to your inbox. One copy of the message will send to each Admin.
I hope this Contact Form will help your blog to get Suggestions and queries from visitors.

View the original article here

Read more ...

Thursday, November 28, 2013

How to Change Blogger POST A COMMENT Message/Text/Style?


Change Post a Comment text from Blogger
You know Comments are the best way to interact or make a good contact with your blog visitors.I think you are all seen a message "Post a Comment" in the bottom of every post in your blog. Do you think it is not so good to see your blog visitors? Then here I am going to show you how to change "Post a Comment" text from that part and place interesting images there. Also I am giving some cool images link with this article. Lets see how to change this


  • Sign In  to Blogger Dashboard

  • Go to Template -> Edit HTML

  • Search (Ctrl+F) for the code marked Bold


  •  Search the next ,that code looks like the following


  • replace  with the image code

  • Select the code of image you want from the following


Style 1


Style 2


Style 3


Style 4


Style 5


Style 6


Style 7


Style 8


Style 9


Style 10


Style 12


  • Save Template

I hope this article will help you. If you got any doubt or Suggestions, please do comment

Article also Applicable for


View the original article here

Read more ...

Wednesday, November 27, 2013

Awesome Recent Comments Widget for Blogger, Feed Comments


Awesome Recent Comments Widget for Blogger, Feed Comments
Recent Comments Widget can be used to display the latest Comments in the blog. Comments are the best way to make a good contact with your blog visitors and followers. By default Blogger added commenting System to Blogger blogs. Recent Comments Widget will inspire your blog visitors to post a comment on your Blog. If you don't like to read full about this widget or Are you hurry to add this widget to you blog go to "How to add Recent Comments Widget to Blogger Blog".


There are many changes made to Blogger Commenting System. At earlier time the basic commenting System was used then it changed to Threaded Comments (Others can reply to one comment), it can be change back to basic blogger Commenting System. All Blogger blogs are using Threaded Comments System. Now another type of commenting System was introduced in Blogger Blogs, Google+ commenting System.
The Recent Comments Widget also inspire your blog visitors to post a comment. Your visitors may be interested to see their names in other blogs. If their comment is good ,it will catch other visitors eyes and they also may have wish to do comment.
The Recent Comment Widget shows the Commentators name with Profile link followed by the Post name and followed by their Comment. This Widget can be added to Sidebar or Footer or anywhere which catches the visitors eyes. This Widget was coded using JavaScript and you can also change the style of Widget according to your template.


Wish to see Demo?
Recent Comments Widget


How to Add Recent Comments Widget?


  • Sign In to Blogger Dashboard

  • Select Layout -> Click on Add a Gadget

  • Take HTML/Javascript from the list

  • Give the Title and Copy the below code to it and Save


Recent Comments Widget


  • Change the RED highlighted with your blog name
If you want different Styles for this Widget, Please visit again I will post soon.

Another Way to add Recent Comments Widget


  • Go to Layout -> Click on Add a Gadget

  • Select Feed from the list and give the following URL

http://netoopsblog.blogspot.com/feeds/comments/default


  • Change the RED marked portion with your Blog URL
A Window will appear and shows demo,there are some options, you can select the options for adding comment date, commenter name etc.. Using this method you have only limited options.


  • Click Save
Congratulations you have done..
I hope this article will help you and you enjoyed this article if so, Please Like and Share .


View the original article here

Read more ...

Tuesday, November 26, 2013

How to add Search engine Friendly Title to Blogger?


This article will help new blogger blog owners and all bloggers to make their blog search engine friendly Titles.By default Blogger blog titles are not search engine friendly.Page Title is group of text that appears on top of your browser.It is more important in showing your blog/blog posts on Search engine results.The Page title is the most important element in your blog in terms of higher ranking in search results.
Here is example,the figure shows the title of our blog post,the blog title is displayed first and after that the post title has been displayed.


Google only displays 70 characters on Google search results and in case of Yahoo display bit more.So your blog posts will not display or you will not get as much rank in Search Results.Let us think about reversing of position of the blog title and post title,Giving the first priority to Post title and it will works.
It will appears like the following figure.

This
Lets see how to optimize your blogger blog titles Search engine friendly.


  • Go to Design->Edit HTML

  • find the following 

<data:blog.pageTitle/>


  • Replace the it with the following code


<data:blog.pageTitle/>

<data:blog.pageName/><SPAN style="COLOR: red"> </SPAN><B style="COLOR: red">- NetOops Blog</B>
Replace the red text by your blog's Name
Done..! you have an SEO friendly page title.

View the original article here

Read more ...

Sunday, November 24, 2013

Awesome Random Posts Widget for blogger Blog


random posts widget
Random Posts widget is an awesome widget for your Blogger Blog.Most important feature of this widget is it lets your Blog visitors to surf more blog posts in your blog.Surely it increases your Blog's internal links that lets your blog higher traffic.
Its let your users to spend more time in your Blog.


Install Random posts widget


Make sure you are Sign In to your Blogger Account.

If you are a beginner in Blogger Editing ,use our one click Widget


  • Click the below Add to Blogger Button to install


Manually Add Random posts Widget


  • Sign In to your Blogger Account.

  • Go to Design->Page Elements

  • Click on Add Gadget and look for HTML/Javascript take it

  • Give the title as you need(eg:Random Posts)

  • Copy and paste the below code to the content section


Blogger Widgets


Click on Save and its Done...If you have any doubts don't hesitate to ask.Please Comment.
I hope you had enjoyed this post.Leave Comments...

View the original article here

Read more ...

Saturday, November 23, 2013

Head banner image changing on reload for Blogger Blog


Head banner image changing on reload for Blogger Blog


Today i am saying about an interesting thing .Head banner changing trick for blogger
This is a simple blogger hack.when you add this, your blogger blog's header image will change after RELOAD the webpage on your browser.
 Follow the instructions :)


  • Sign In to your blogger account.

  • Go to Template->Edit HTML

  • Find ]]> and paste the following code before it.

#header {
background: url("your header image url in quotes") no-repeat left bottom;
margin:0;
padding:2px;
}


  • Then copy the below script  and place above the tag:


you are done...:)
If any problem with this blogger trick please leave comment,don't hesitate to ask,we are happy to help you:)

View the original article here

Read more ...

Thursday, November 21, 2013

Verified Facebook Page tick mark for Blogger Author Comments


Do you noticed a tick mark in some Facebook Pages like Actors, Political Leaders. Verified mark is only available for Worldwide stuff like big companies, Actors such have the chance to be faked. When we move mouse over that tick, it shows a "Verified Page" message. Do you wish to add that verified tick mark to  your (Author/Admin) comment in your blog.Here I am going to show you how to add Facebook verified Page mark to Admin comments.


Add Facebook verified Page tick to Author Comments


  • Sign In to Blogger Dashboard

  • Go to Template  -> Edit HTML

  • Find .comments .comments-content .icon.blog-author and delete the following code inside it

background-repeat: no-repeat;
  background-image: url(data:image/png;base64,iVBORw0KGgoAAAANSUhEUgAAABIAAAASCAYAAABWzo5XAAAAAXNSR0IArs4c6QAAAAZiS0dEAP8A/wD/oL2nkwAAAAlwSFlzAAALEgAACxIB0t1+/AAAAAd0SU1FB9sLFwMeCjjhcOMAAAD+SURBVDjLtZSvTgNBEIe/WRRnm3U8RC1neQdsm1zSBIU9VVF1FkUguQQsD9ITmD7ECZIJSE4OZo9stoVjC/zc7ky+zH9hXwVwDpTAWWLrgS3QAe8AZgaAJI5zYAmc8r0G4AHYHQKVwII8PZrZFsBFkeRCABYiMh9BRUhnSkPTNCtVXYXURi1FpBDgArj8QU1eVXUzfnjv7yP7kwu1mYrkWlU33vs1QNu2qU8pwN0UpKoqokjWwCztrMuBhEhmh8bD5UDqur75asbcX0BGUB9/HAMB+r32hznJgXy2v0sGLBcyAJ1EK3LFcbo1s91JeLwAbwGYu7TP/3ZGfnXYPgAVNngtqatUNgAAAABJRU5ErkJggg==);


  • And copy the following code inside it

backgroundurl("https://dl.dropboxusercontent.com/s/gp8fhc34w2rka9h/verified%20page.png") no-repeat scroll 0 0 transparent;


  • Final code looks like the following


I hope this article will help you to customize your admin comment. Please Like and Share.

View the original article here

Read more ...

Wednesday, November 20, 2013

Related Posts Blogger Widget and LinkedWithIn for Blogger


Related Posts Blogger Widget and LinkedWithIn for Blogger
Related posts Widget, as the title says , this Widget will generate the list of related posts. this Widget can be added either in homepage (under each posts) or inside the post. By placing this related posts Widget, there is chance the spread the other posts to visitors and they may have a tendency to take that post from the list, it will reduce the bounce rate of your blog and will keep your visitors from suddenly quit from your blog. Let's see how to add related posts widget to Blogger


Using LinkedWithIn Widget


  • It is very simple to add LinkedWithIn Widget

  • Go to LinkedWithIn website and follow the simple instructions

  • Give e-mail id, blog url, select platform as Blogger and select number of posts should be displayed.


 Add Related Posts Manually to Blogger


  •  Sign In to Blogger Dashboard

  • Go to Template -> Edit HTML

  • Find  

  • Copy the below code above


/* remove this */

Blogger Widgets


Blogger Widgets


    • Remove Orange marked to add related posts to homepage too.

    • Change RED marked to change the number of posts should be displayed
    I hope this article will help you. If so please like and share our blog. You can check here more Exciting Widgets.

    View the original article here

    Read more ...

    Monday, November 18, 2013

    Add Animated Ramadan Lantern Widget/Ramadan Hanging Light to Blogger?

    type='html'>
    Ramadan also known as Ramzan is a holy festival of Islam. This spiritual event is celebrated by fasting(every day sunrise to sunset) for a whole month.Ramadan is the month in which was sent down the Qur'an,
    as a guide to mankind, also clear Signs for guidance and judgment between right and wrong. So everyone of you who is present during that month should spend it in fasting. In this time have you ever think about designing / decorating your blog something special. If you have a wish like that don't wait, here I am going to show a tutorial about decorating your blog with Ramadan Lanterns.

     Before revealing this tutorial I would like to thank Syed Faizan Ali of MyBloggerLab.com, he made this animated Ramadan Lantern for blog users. Not only for blogger users but also can use this to Websites or Other blogging platforms(WordPress,Drupal etc) . This animated hanging light created in flash so your browser should support Flash Player,Otherwise you have to install Flash Player. In newer Operating Systems (Windows 7, Windows 8) Flash Player already installed it.Flash Animated Ramadan Lantern in top of our blog,you can see a hanging Lantern spinning to left to right then also back with a glowing Ramadan Kareem in background. This Ramadan Lantern looks very nice in Dark backgrounds,Blue,Orange Backgrounds.
    You can see the demo in top of our Blog

    How to add Animated Ramadan Lantern ?

    • Sign In to Blogger Dashboard
    • Go to Template -> Edit HTML
    • Find (Ctrl+F)
    • Copy the Following code just above it


    Click on  Save. It's done. Check your Blog
    Here I  am posting this article in this holy occasion of Ramadan not only to reveal this trick but also to show respect ,Kindness to the atmosphere filled with spirit of mirth and love of Ramadan. In this holy occasion I heartily wishing you a Happy Ramadan.

    View the original article here

    Read more ...

    Saturday, November 16, 2013

    Remove Threaded Comments in blogger Easily trick revealed


    remove threaded comments blogger
    This is a simple article explaining How to remove Blogger 's New Threaded commenting system easily.There are some problems with it,Many users report that when a user click on post link,it takes control to the bottom of the page(to the comment section).Would you think that Threaded commenting system is not Good for Blog? Then you can remove it.
    I am not going to say too much about Threaded commenting System,because i hope you know about it.
    Follow the instructions below carefully.


    Before Editing Template,you must Backup your template(How to Backup Template?)


    • Go to Design-> Edit HTML

    • Tick on Check box  Expanded Widget Templates

    • Find the code data:post.showThreadedComments easily using ctrl+F

    • You will found code snippet like this


    • Replace it carefully with the following code [Note: You will find the above code twice,replace it twice]


    • Save it ,
    No longer Threaded commenting appear on your blog.Normal commenting will back.
    Cheers..!


    View the original article here

    Read more ...

    Friday, November 15, 2013

    Extreme CSS3 Floating Google Search Bar for Blogger FREE..!!


    Google search bar for Blogger
    All of you know about Google Search bar. You'd see the style of search bar used in Google. If you didn't see Google search bar either go to Google or please see the right top of  our blog, you can see a static Google search bar. Here is a trick to add this Google search bar to your blog. This is not the real Google search bar, instead this is a CSS3 styled search bar using Blogger's search method. If you need Google's real search bar[but it can't get Google's search box style] go to http://www.google.co.in/cse. Let's see how to add Google type search bar to your blog...


    Demo shows in right top ?
    Features


    • Floating Static (Fixed) Search bar

    • CSS3 styled search bar

    • CSS3 animated


    • Go to Layout -> Click on Add a Gadget

    • Select HTML/JavaScript from the list

    • Leave the Title as Blank and copy paste the following code inside the Content portion


                                  OR


        • Sign in to Blogger Dashboard and go to Template -> Edit HTML

        • Search (Ctrl+F)  

        • Copy and paste the following code after it


        I hope this article will help you. If any problem with this please do comment.

        View the original article here

        Read more ...

        Wednesday, November 13, 2013

        Customize Labels Widget with Stylish Cool Effects


        Customize Labels Widget with Stylish Cool Effects
        Labels widget displays list of the categories of posts. Creating labels helps to categorize the posts in groups. So it helps visitors to see the posts under a category. Default blogger Labels widget is not so Stylish. Don't worry, here I am sharing some cool interesting labels widget styles for you. This Labels widget can style using simple CSS codes. To do this follow the steps..


        •  Sign In to Blogger Dashboard

        • Go to Template -> Edit HTML

        • Find ]]> and copy the code of label style you like above ]]>

        • Save Template

         Black Forest Theme Labels with animated Scaling


        .Label li {
                background: linear-gradient(to bottom, #6B6B6B 0%, #6B6B6B 4%, #333333 1%, #2B2B2B 100%) repeat scroll 0 0 transparent;
                border: 1px solid;
                border-radius: 6px 6px 6px 6px;
                float: left;
                font-size: 116%;
                list-style: none outside none;
                margin: 2px;
                padding: 4px;
                transition: all 0.3s ease 0s;
            }
        .Label li:hover {
            transform: rotate(351deg) scale(1.7);
        }


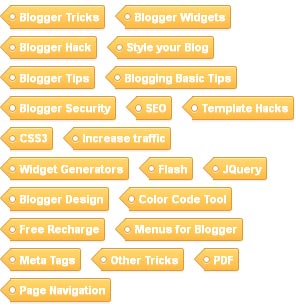
        Yellow Customized labels Widget


            .Label li:before {

                background-image: -moz-linear-gradient(left top , #FEDA71, #FEBA47);

                border-bottom: 1px solid #D99D38;

                border-left: 1px solid #D99D38;

                content: "";

                height: 1.39em;

                left: -0.69em;

                position: absolute;

                top: 0.2em;

                transform: rotate(45deg);

                width: 1.3em;

                z-index: 1;

            }

            .Label li:after {

                background: none repeat scroll 0 0 #FFFFFF;

                border: 1px solid #D99D38;

                border-radius: 4.167em 4.167em 4.167em 4.167em;

                box-shadow: 0 1px 0 #FAEABA;

                content: "";

                height: 0.5em;

                left: -0.083em;

                position: absolute;

                top: 0.667em;

                width: 0.5em;

                z-index: 9999;

            }

            .Label li {

                background-image: -moz-linear-gradient(center top , #FEDA71, #FEBA47);

                border-bottom: 1px solid #D99D38;

                border-radius: 0 0.25em 0.25em 0;

                border-right: 1px solid #D99D38;

                border-top: 1px solid #D99D38;

                box-shadow: 0 1px 0 #FAEABA inset, 0 1px 1px rgba(0, 0, 0, 0.1);

                color: #996633;

                float: left;

                font-family: 'Helvetica Neue',Helvetica,Arial,sans-serif;

                font-size: 0.75em;

                font-weight: bold;

                list-style: none outside none;

                margin: 0 0 7px 20px;

                padding: 0.417em 0.417em 0.417em 0.917em;

                position: relative;

                text-decoration: none;

                text-shadow: 0 1px 0 rgba(255, 255, 255, 0.4);

                z-index: 1;

            }


        Blue Customized Labels Widget


            .Label li:before {

                background-image: -moz-linear-gradient(center top , #1E5799 0%, #207CCA 100%);

                border-bottom: 1px solid #145091;

                border-left: 1px solid #145091;

                content: "";

                height: 1.39em;

                left: -0.69em;

                position: absolute;

                top: 0.2em;

                transform: rotate(45deg);

                width: 1.3em;

                z-index: 1;

            }

            .Label li:after {

                background: none repeat scroll 0 0 #FFFFFF;

                border: 1px solid #3F6893;

                border-radius: 4.167em 4.167em 4.167em 4.167em;

                box-shadow: 0 1px 0 #B5D8FF;

                content: "";

                height: 0.5em;

                left: -0.083em;

                position: absolute;

                top: 0.667em;

                width: 0.5em;

                z-index: 9999;

            }

            .Label li {

                background-image: -moz-linear-gradient(center top , #1E5799, #207CCA);

                border-bottom: 1px solid #145091;

                border-radius: 0 0.25em 0.25em 0;

                border-right: 1px solid #145091;

                border-top: 1px solid #145091;

                box-shadow: 0 1px 0 #CCE4FF inset, 0 1px 1px rgba(0, 0, 0, 0.1);

                color: #996633;

                float: left;

                font-family: 'Helvetica Neue',Helvetica,Arial,sans-serif;

                font-size: 0.75em;

                font-weight: bold;

                list-style: none outside none;

                margin: 0 0 7px 20px;

                padding: 0.417em 0.417em 0.417em 0.917em;

                position: relative;

                text-decoration: none;

                text-shadow: 0 1px 0 rgba(255, 255, 255, 0.4);

                z-index: 1;

            }


         Black Forest Theme Label like NetOops Blog Labels


            .Label li {

                background: linear-gradient(to bottom, #6B6B6B 0%, #6B6B6B 4%, #333333 1%, #2B2B2B 100%) repeat scroll 0 0 transparent;

                border: 1px solid;

                border-radius: 6px 6px 6px 6px;

                float: left;

                font-size: 116%;

                list-style: none outside none;

                margin: 2px;

                padding: 4px;

                transition: all 0.3s ease 0s;

            }

            .Label li:hover {

                transform: rotate(5deg);

            }


        Skeleton Theme for Labels Widget


        .Label a {
            color: #000000;
            text-decoration: none;
        }
        .Label li {
            border: 1px solid #000;
            border-radius: 6px 6px 6px 6px;
            color: #000000 !important;
            float: left;
            font-size: 116%;
            list-style: none outside none;
            margin: 2px;
            padding: 4px;
            transition: all 0.3s ease 0s;
        }


        Skeleton Theme with Painting Hover Effect


        .Label a:hover
        {
        text-shadow:5px 5px 5px #dcdcdc;
        background:orange;
        border:1px solid orange;
        border-bottom-right-radius: 0px;
        border-top-left-radius: 0px;
        border-bottom-left-radius: 30px;
        border-top-right-radius: 30px;
        }


        Leaf theme for Labels Widget


        .Label a {
             -moz-border-bottom-colors: none;
             -moz-border-left-colors: none;
             -moz-border-right-colors: none;
             -moz-border-top-colors: none;
             background-color: #7FBF4D;
             background-image: -moz-linear-gradient(center top , #7FBF4D, #63A62F);
             border-bottom-right-radius: 30px;
             border-color: #63A62F #63A62F #5B992B;
             border-image: none;
             border-style: solid;
             border-top-left-radius: 30px;
             border-width: 1px;
             box-shadow: 0px 1px 0px 0px #96CA6D inset;
             color: #FFFFFF;
             float: left;
             font: 14px verdana;
             height: 18px;
             margin-bottom: 9px;
             margin-left: 10px;
             padding: 10px;
             position: relative;
             text-decoration: none;
             transition: all 0.5s ease-in-out 0s;
        }

        .Label a:hover {
             background: none repeat scroll 0% 0% orange;
             border-radius: 0px 30px 0px 30px;
             border: 1px solid orange;
             text-shadow: 5px 5px 5px #DCDCDC;
        }

        .Label {
             margin: 0px;
             padding: 0px;
             position: relative;
        }


        View the original article here

        Read more ...

        Monday, November 11, 2013

        Add Comment count to Post Header Titles in Blogger


        Add Comment count to Post Header Titles in Blogger
        You noticed the number of comments displayed in comments section inside each posts. It is placed under the post. It is not noticeable to visitors. Do you want to add it to header to inspire your visitors to comment. The visitors only see the comment count when they reach at the end of the post. if the visitor not scroll to footer part , the comment count will not see.
        Do you think about displaying comment count on the top of post will be better? Then here we are showing a technique to add comment count with beautiful backgrounds to the header part of the post, not only inside the post but also it will display to homepage.


        After adding his trick the comment count will be displayed with post titles , if more comments on the post, it will encourage the users to comment and also helps to jump to comment section.


        How to add Comment count to Post Header


        • Sign In to Blogger Dashboard

        • Go to Template -> Edit HTML

        • Find (Ctrl+F) ]]> and copy the below code above it

        .comment-count {
        float : right;
        width : 48px;
        height : 48px;
        background : url(  IMAGE URL  );
        background-repeat: no-repeat;
        font-size : 18px;
        position:absolute;
        margin-top : -15px;
        margin-right : 2px;
        text-align : center;

         Choose the comment count background


        • Copy the URL of image you want by right clicking and select Copy image Location or Copy Image URL.

        • Replace the RED marked portion above with the image URL


              Bubble Comment Count in blogger     Bubble Comment Count         Add Bubble Comment Count    Bubble Comment Count  Bubble Comment Count   bubble comment blogger    bubble comment blogger     bubble comment blogger        blogger tips, blogger tricks    blogger widgets, bubble comment count         blogger comments, comment count          

         Add Comment count code


        •  Find the following code 


         or

         class='post-title entry-title'


        •  Add the following code below it


        •  Save Template
        Congratulations you have done. Check your blog and get more comments. If you liked this article please like and share this blog.

        View the original article here

        Read more ...